Do you want to connect your email with Webnode with Gmail.com and set up Gmail as a mail client?
Send&Receive messages from Webnode to Gmail.
In tutorial How To Create A Professional Email Signature? Simply and FREE i show you very nice way how to create professional email signature.
In this tutorial, I’ll show you how to set up mail from Webnode to Gmail.
Once the Gmail mail client has been properly set up with a Webnode email account, you will be able to receive and send messages directly from Gmail.
The instruction is divided into 2 parts.
2. Connect Webnode email with Gmail mail client.
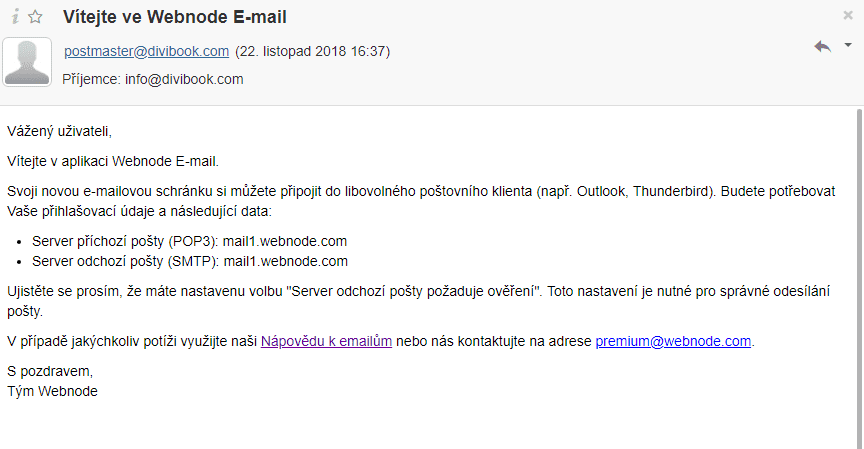
Create an e-mail with Webnode and find the email server address (mail1.webnode.com or mail2.webnode.com)
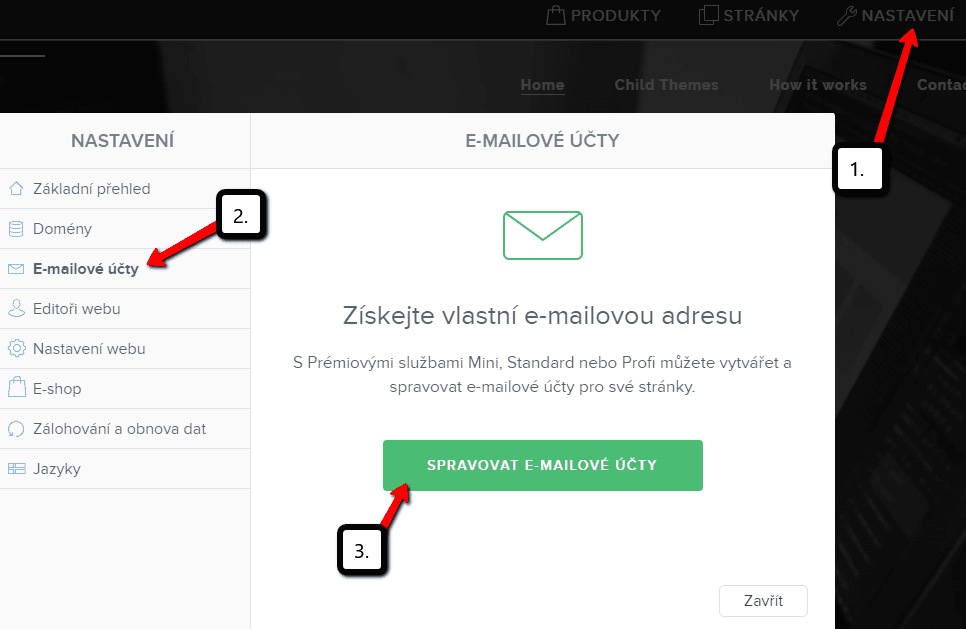
1. Click “Settings“, “Email Accounts” and “Manage Email Accounts“.
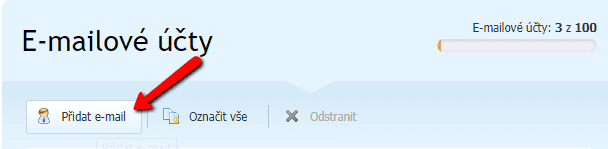
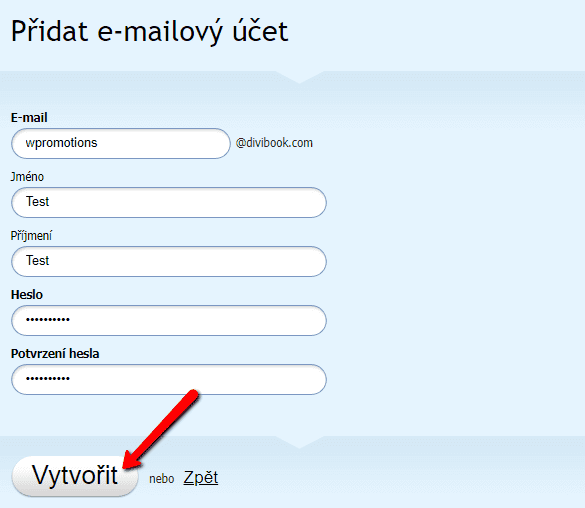
2. Create e-mail
3. Fill in your new email and set your pass.
4. Log off from the account where you manage the website and sign in to the email box you created on Webnode.com.
*For more information about signing in to the email box, see this Webnode tutorial.
5. When you log in to the email, you will see an email that contains your data for a mail client, f.e Gmail or MS Outlook …
Link the Webnode email to the Gmail mail client.
Incoming mail setup:
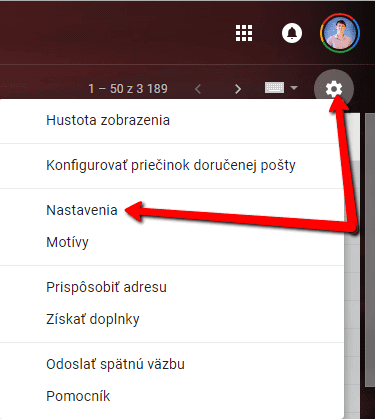
1. Log in to Gmail and click “Settings“:
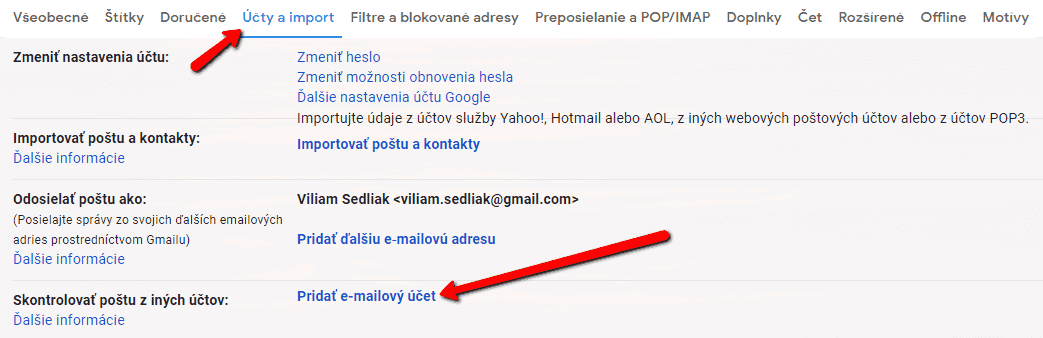
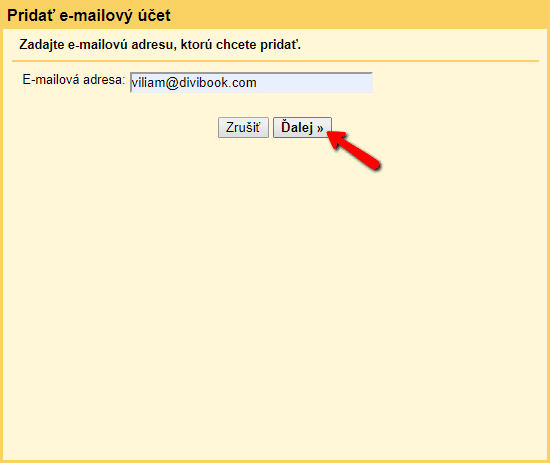
2. Click ‘Accounts and Import‘ in the top bar and continue with ‘Add Email Account‘.
3. Enter your e-mail address that you created with Webnode.
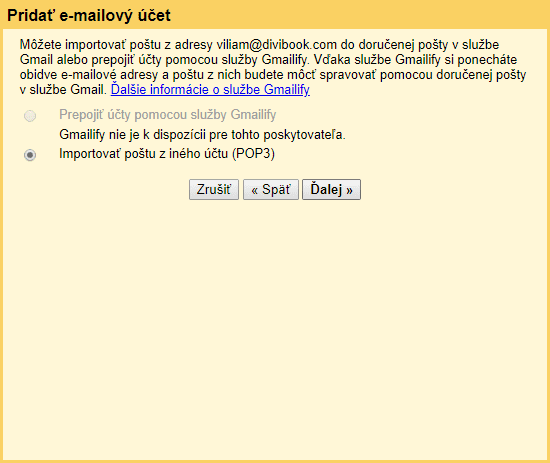
4. Leave the option “Import mail from another account (POP3)”
and click Next.
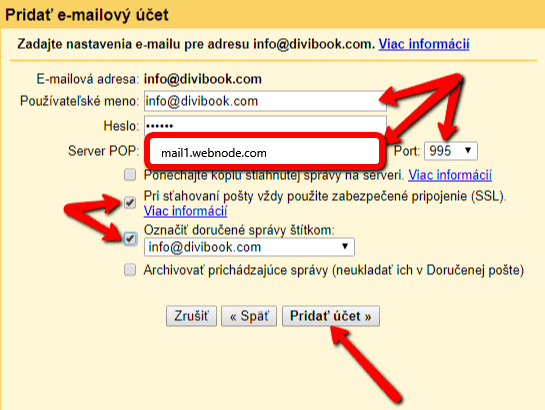
5. Enter the login information for your email account.
* Fill in the email server as described in the email message. *There is just 2 options: mail1.webnode.com or mail2.webnode.com
*Set the port to 995.
*Always use Secure Connections (SSL) when downloading mail
*Mark your inbox with “yourmail@domain.com”
6. Outgoing mail (SMTP) setup.
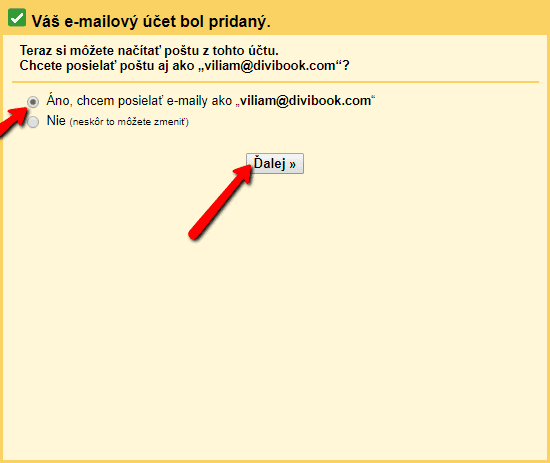
If you want to send messages from Gmail under the email header from Webnode, check “Yes – I want to send emails like” … “and click Next.
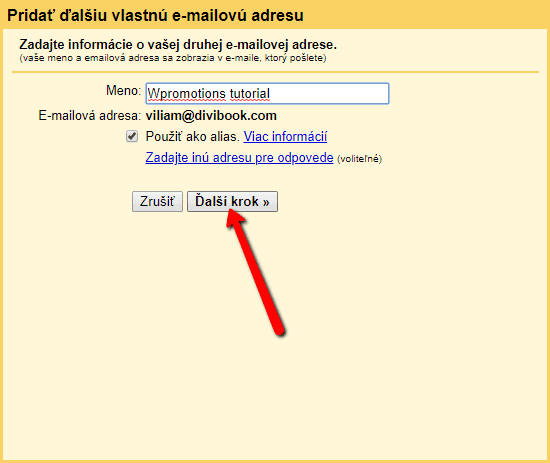
7. Enter your name, tick “Apply as alias” and continue to “Next step“.
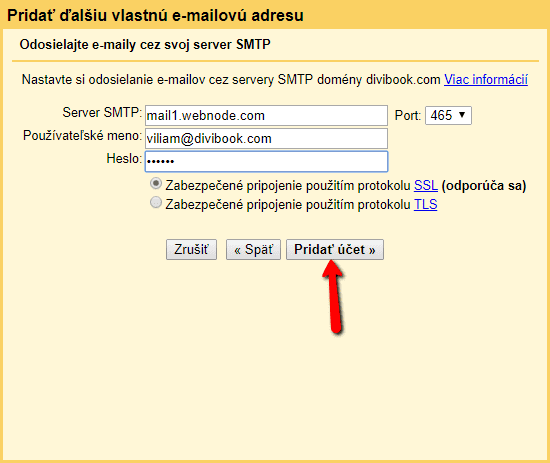
8. Enter the SMTP server as specified in the Webnode email message. Fill in the login information for that mailbox, change the port to 465, check “Secure Connection Using SSL” and continue to “Add Account“.
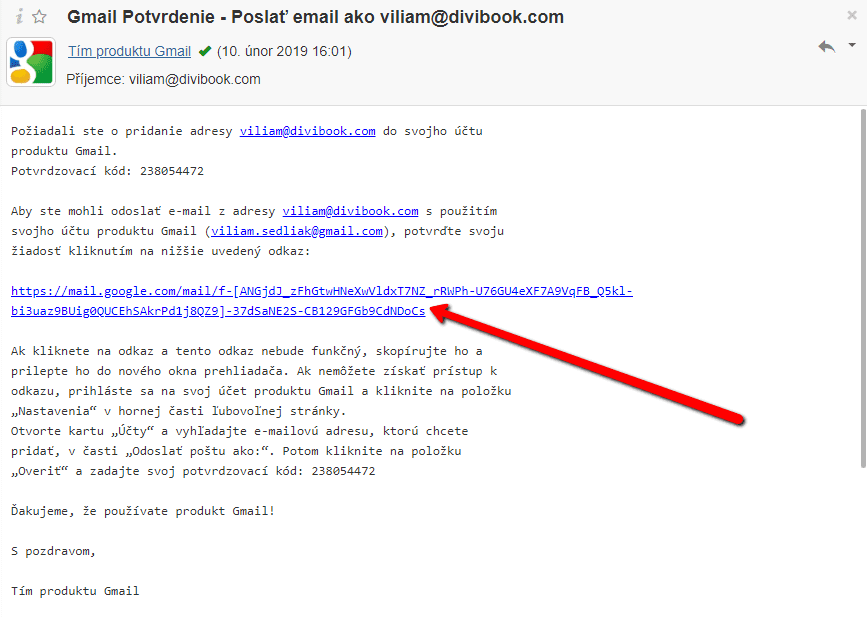
9. To your Webnode e-mail box, Google will send you a verification email.
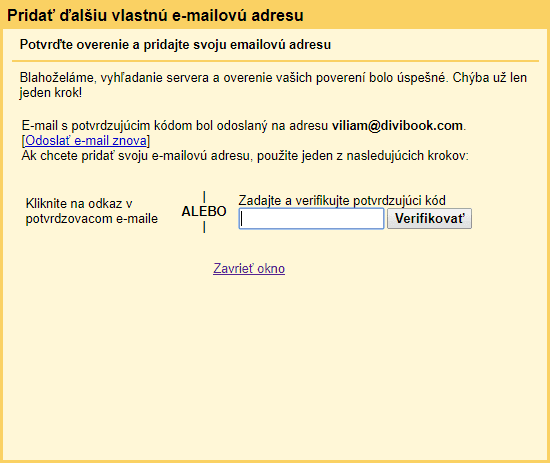
Click the verification link and you are done 🙂
Excellent – you’re done. The Gmail Mail Client is set up correctly, and you can now receive and send messages under the heading of your business email! 🙂
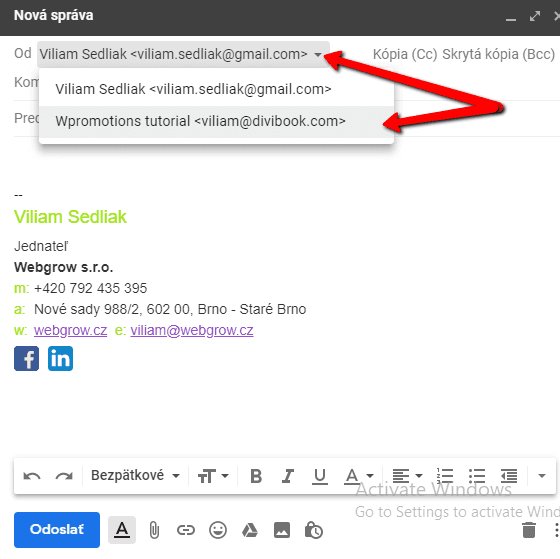
Preview Gmail Mail Client
When sending a message in a Gmail, you simply choose your email: